Showing posts with label mizzle. Show all posts

Tuesday, March 10, 2015

Colombo Mizzle Golf Cover

As I do every year, I created another Mizzle golf club cover for my friend McEvoy.  Another to add to his collection.  I know I've said this in a previous post, but I really do look forward to making this every year.  It challenges me.  It forces me to create in the boundaries right out of my comfort zone.


This year he wanted Colombo.


I used my usual materials, but I experimented with using faux fur for the hair.  It is a messy material to work with when having to cut it into pieces, but it worked perfectly for the hair styles I was recreating this year with the TLC Mizzles.


I've had requests for next year's theme.  A few possibilities are: Star Wars, The Beatles, famous scientist, famous literary artists, and Tim Burton characters.  We'll see what creations will happen next year!


Monday, March 2, 2015

TLC Mizzles 2015

Every year our school does a school-wide fundraiser for TLC (True Lasting Connections), which is a non-profit organization that provides a variety of health and medical services for families in the community who are in need of help.  This organization runs solely on donations and grants. It is a great organization and it feels great to participate in this fundraiser knowing the money will be going towards helping my students and their families.

A few years ago, I began auctioning my Mizzles to help raise money for this organization.  Each year, the Mizzles have become more elaborate in size, shape, and costume.  Last year, I created a superhero series.  They were fun characters who had useless superpowers.  This year the Mizzles are impersonating historical figures.

From left to right: Amelia Earhart Mizzle, Mahatma Gandhi Mizzle, Adolf Hitler Mizzle, Albert Einstein Mizzle, Abraham Lincoln Mizzle, Cleopatra Mizzle, and Queen Elizabeth I Mizzle.

Each Mizzle and their costume was sewn by hand.  They were a lot of work, but so much fun to make.

Friday, January 9, 2015

Recreations

At the beginning of the school year, I was inspired to put Mizzles in famous paintings.  I am calling this series "recreations."  It all began with Frida Self portrait I did last year.

I thought it would be fun to create more using colored pencil.  Of course, I don't want to derail my original goals or projects, but sometimes you need another project to alternate between.  It helps prevent boredom.

So, I decided I would begin with sketches.  This way I could see if it would be a successful piece for the Mizzles to recreate.

Can you identify these famous paintings?


Not all of these will make the final cut into a colorized version, but they have been fun to sketch out.

Here are a few that I turned into color versions: 


 I'm hoping to get about 10 color versions done by the end of the year, but we'll see how that goes.  :)


What paintings would you like to see the Mizzles recreate?


Monday, April 14, 2014

The McEvoy Collection

About 4 years ago, my friend asked if I could make one of the Mizzles as a golf club cover.  I was a little hesitant because I wouldn't be able to stuff it, but I liked the challenge.  What began as one cover turned into many.  Each year I have made him a new cover.  And each year, I create a new master piece that I fall in love with.  As a result, I have named this collection of golf club covers "The McEvoy Collection," after my friend. 

Where do I start?
It usually begins with a theme or idea he's been thinking about or we brainstorm a few things either from jokes amongst our group.  Then I begin to build from there.  The first few have had their errors.  And over the years, he has helped me figure out solutions to make them better than before. 


#1

#2 and 3


#5
#4


#6

#7
#8 two sides
#8 side 2
#8 side 1


They have been so much fun to create.  They each have had such great personalities.  This year I was given the theme Elvis. This makes my 9th Mizzle Golf Club Cover. I feel that Elvis Mizzle is one of my best creations.  It was really hard to part with him.


Before Elvis made it to his new home, he spent some time at the beach in the sun.
 
  I'm looking forward to the next year's theme.  It will be a challenge to out do myself next year.

Saturday, March 8, 2014

Frida-like self-portrait

In January, my best friends and I went to see The Complete Frida Kahlo exhibit in San Diego (which is now extended to June 8th!)  It is an exhibit which shows 123 replicas of her work in the exact sizes and style.  I have to warn you.  It is a lot of art to look at.  I spent almost 4 hours there.  I love Frida Kahlo's work because she freely and openly told the world about her life and pain through her art.  Her portraits hold so much meaning and heart.  I left there absolutely overwhelmed and inspired.  But I didn't know how to take what I saw and incorporate it into my own art.  That is when my best friend, Lydia, gave me the idea to do a series of self-portraits in the same style and poses of Frida, and replace her pets with my Mizzles.  I loved this idea.

It kind of worked out for me that my Intermediate/ Advanced Students were about to begin a colored pencil self-portrait.  This was the perfect opportunity for me to create this artwork while creating an example for my students.  It has been a few years since I've created anything in colored pencil.  I forgot how much I love to blend and burnish. 

 I took it to my Huntington Beach Art League meeting and entered it into the drawing category.  I am happy to report that it received an Honorable Mention.
 
Instead of posting all of the progression photos I took, I thought it might be nice to watch them in a video slide show.  The song is called Beautiful Things by Gungor.  It is one of my favorite songs at the moment.
 
This has definitely been one of my most favorite projects.  I already have an idea of my next portrait, but it will have to wait a bit.  I have to get back to working on my book.

Thursday, January 23, 2014

Owls...New Mizzle Friends part 2

At the beginning of the school year, students were watching me work on the "Rock Concert."


 They really loved how I was taking the scrapbook paper and creating layers.  Since they were showing such a huge interest in my technique, I thought it might be fun to create a lesson where they worked in the same style.  My students are illustrating a Greek or Roman myth.  They seem to like the assignment, but are having a little bit of trouble understanding the layering concept.  So, I decided to make another version of the owl painting, but to work in the steps that my students will be working in.  This meant working in a planed approach, which is not my usual habit.  Also, I knew I was going to be doing a live demo painting at the Orange County Creatives Gallery, so this piece worked as a great sample for my students and a great in progress piece to finish at the gallery.

Normally, I collage the background and scenery first.  Then add the characters.

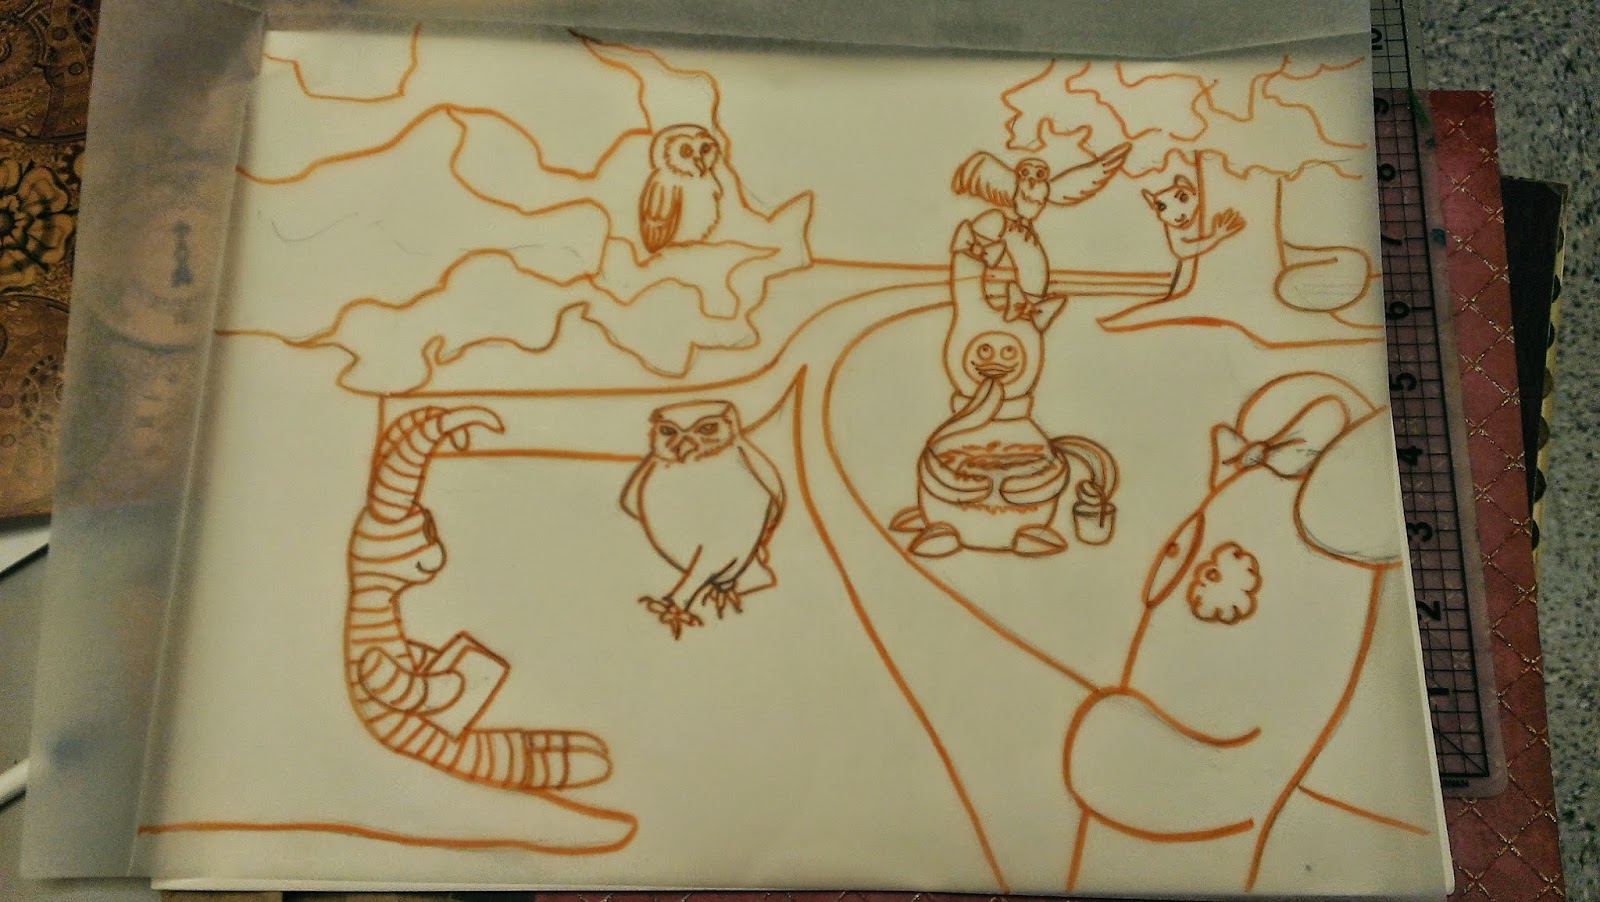
Here I began by drawing the entire scene onto tracing paper.  Then I traced my lines with marker (I used orange, but it doesn't matter.) 


Then I used graphite to cover the marker lines on the back of the tracing paper.  I did this so I could transfer parts of my drawing to the scrapbooking papers.


I began by working from the background to the foreground, which is my sky and ground. The scrapbooking paper comes in 12x12, so when working on larger paper you need to be careful about where you place the line created by two pieces of paper.  I tell my students not to put it in the center, but to put it off towards the side and to try to place it where other parts of your art work will cover it.  In this case, I will have a tree and Larry mizzle covering most of the line.


Then I added the road.  Even though my characters are covering parts of the road in my drawing, I cut it out of the paper whole.  This adds to creating depth with the natural layering of the paper.
When collaging, you have to be careful about the colors and textures you choose.  I had a few choices that I liked for the bark of the trees.
option 1: a wood textured paper
with a light and dark green
Option 2: a lighter version of the ground
Option 4: a greenish brown

Option 3: cream colored texture


I really liked option 3 because later I will be adding shadows and details with watercolor.  I felt if I went with a darker paper, the trees might be too dark for the painting.

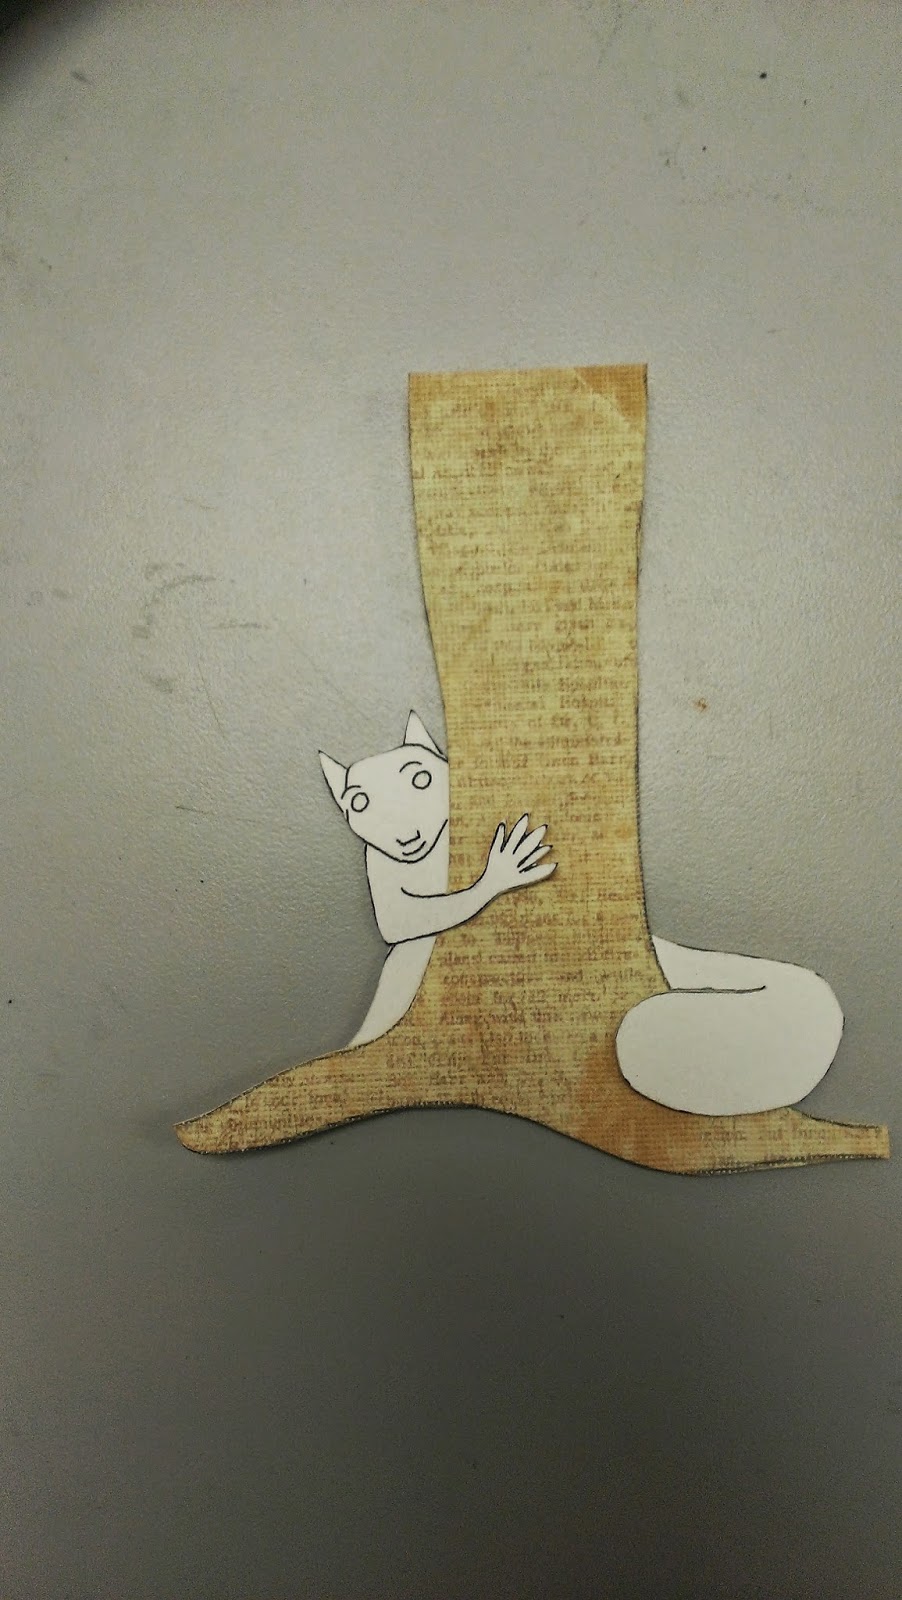
I traced the drawing over the chosen papers and began cutting them out. Here are photos of the trees and characters drawn and then cut out.


The squirrel is drawn behind the tree, so I drew it whole and cut it out.  I cut slits on the sides of the arm and tail so it could snuggly wrap around the tree.

Normally when I glue the pieces together I use a heavy book to apply pressure and bond the papers together.

But at my painting demo, I used a brayer to flatten and apply pressure to each individual piece.


Once all of the pieces are glued down, then I begin painting with watercolor.


I didn't get to finish the painting at the painting demo, but I've been working on it this week.  It's almost done.

Here are some photos Orange County Creatives took of my painting demo at the gallery last Sunday.  Life-size Larry came with me.  My best friend, Lydia, made him his wonderful bathing suit!